How to Replace Your Car's Air Filter
A Comprehensive DIY Guide
Paul Gray
2/8/20244 min read

Car maintenance is an essential aspect of owning a vehicle. Regular maintenance ensures that your car runs smoothly and efficiently. One crucial maintenance task that every car owner should know how to do is replacing the air filter. The air filter plays a vital role in protecting your car's engine from dust, debris, and other contaminants that can cause damage. In this comprehensive guide, we will walk you through the step-by-step process of replacing your car's air filter, providing you with the knowledge and confidence to tackle this DIY project
Why is Air Filter Replacement Important?
Before we dive into the process of replacing your car's air filter, let's understand why it is essential. The air filter is responsible for filtering the air that enters your car's engine. It prevents dust, dirt, pollen, and other particles from entering the engine and causing damage. Over time, the air filter gets clogged with these contaminants, reducing its efficiency and potentially restricting airflow to the engine. A clogged air filter can lead to decreased fuel efficiency, decreased engine performance, and even engine damage. Regularly replacing your car's air filter ensures that your engine receives clean air, improving its performance and longevity.
Tools and Materials You'll Need
Before starting the air filter replacement process, gather the necessary tools and materials. Here's a list of what you'll need:
New air filter: Check your car's owner's manual or consult an auto parts store to find the correct replacement air filter for your specific vehicle model.
Screwdriver or socket set (if required): Some air filter boxes may require a screwdriver or socket set to open.
Clean cloth or vacuum cleaner: You'll need this to clean the air filter housing.
Latex gloves: Wearing gloves will protect your hands from dirt and contaminants.
Safety glasses: It's always a good idea to protect your eyes while working under the hood.
Step 1: Preparation and Safety Measures
As with any DIY project, it's essential to take the necessary safety precautions before starting. Here's what you need to do:
Park your vehicle on a flat, dry surface: Find a safe place to park your car, ensuring that it is on a level surface.
Engage the parking brake: Apply the parking brake to prevent the car from moving while you work on it.
Turn off the engine: Make sure the engine is turned off before you begin.
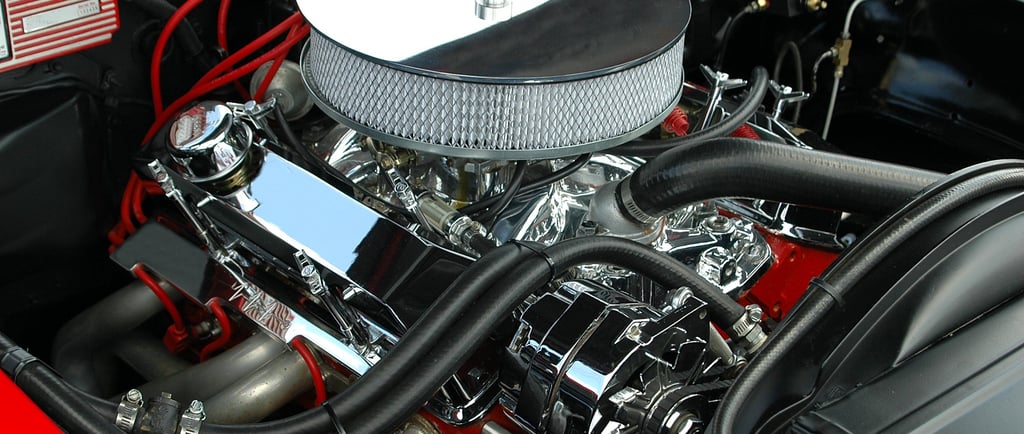
Step 2: Locate and Access the Air Filter Housing
The air filter housing is usually located under the hood of your car. To access it, follow these steps:
Open the hood: Release the hood latch inside the car and then lift the hood. Use the prop rod to secure the hood in an open position.
Locate the air filter housing: The air filter housing is typically a rectangular or circular plastic box located near the engine. It may have clamps or screws holding it together.
Step 3: Remove the Old Air Filter
Once you have located the air filter housing, it's time to remove the old air filter. Follow these steps:
Open the air filter housing: Depending on the type of housing, you may need to release latches, tabs, or screws to open it. Use your hands, a screwdriver, or a socket set, if necessary.
Take note of the air filter's orientation: Before removing the old air filter, observe how it is installed. Take note of its position and direction to ensure proper installation of the new filter.
Remove the old air filter: Carefully lift the old air filter out of the housing. Pay attention to any dirt or debris that may have accumulated in the housing.
Step 4: Clean the Air Filter Housing
With the old air filter removed, it's a good idea to clean the air filter housing before installing the new filter. Follow these steps:
Inspect the housing: Check the housing for any dirt or debris. Use a clean cloth or a vacuum cleaner to remove any loose particles.
Clean the housing: Wipe the inside of the housing with a clean cloth to remove any remaining dirt or debris. Ensure that the housing is clean and free from any obstructions that may affect the new filter's performance.
Step 5: Install the New Air Filter
Now that the air filter housing is clean, it's time to install the new air filter. Follow these steps:
Position the new air filter: Take the new air filter and align it with the housing, ensuring that it matches the orientation of the old filter.
Insert the new air filter: Carefully slide the new air filter into the housing, making sure it fits snugly and securely.
Close the air filter housing: Once the new air filter is in place, close the air filter housing. Secure it using the latches, tabs, or screws, depending on the type of housing.
Step 6: Final Checks and Clean-Up
With the new air filter installed, it's time to perform some final checks and clean-up. Follow these steps:
Double-check the installation: Ensure that the new air filter is properly installed and positioned in the housing.
Secure the air filter housing: Make sure the air filter housing is securely closed and fastened.
Clean up the work area: Remove any tools, debris, or cleaning materials from the engine bay and close the car's hood.
Step 7: Maintenance Schedule and Additional Tips
Replacing your car's air filter is an essential part of regular maintenance. It is recommended to check and replace the air filter every 12,000 to 15,000 miles or as recommended by your car's manufacturer. Additionally, here are some additional tips to keep in mind:
Follow the manufacturer's recommendations: Always consult your car's owner's manual for specific instructions and recommendations regarding air filter replacement.
Consider the environment: If you frequently drive in dusty or dirty conditions, you may need to replace the air filter more often.
Inspect the air filter regularly: Periodically check the condition of your air filter to ensure it is not excessively dirty or damaged.
Consult a professional if unsure: If you're not comfortable or confident in replacing your car's air filter, it's best to consult a professional mechanic.
Conclusion
Replacing your car's air filter is a simple yet important maintenance task that can have a significant impact on your vehicle's performance and longevity. By following the step-by-step guide outlined in this article, you can confidently replace your car's air filter and enjoy the benefits of clean air entering your engine. Remember to consult your car's owner's manual for specific instructions and recommendations, and always prioritize safety while working under the hood. With regular air filter replacement, you'll ensure that your car runs smoothly and efficiently for years to come.